|
 |
 |
 |
 |
 |
 |
|
Byland Abbey: History
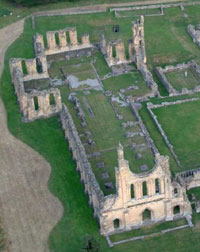
Byland Abbey: Buildings
|
The design and layout of the church
The layout of the Cistercian church represented and reinforced distinctions within the monastery. A defining feature of the Cistercian Order was its incorporation of two communities, and the abbey church was designed to accommodate both groups separately. Whereas the monks’ choir was in the eastern part of the church, the lay-brothers’ was in the west; the two were divided by a large partition known as the rood screen. Further divisions separated the sick from the well, and members of the community from outsiders.
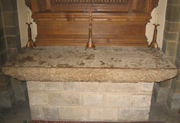
The church at Byland was cruciform in shape. The aisled nave was divided into eleven bays and extended about one hundred metres in length. The lay-brothers’ choir occupied the six westernmost bays; the next two bays formed the retrochoir and the final three were occupied by the monks’ choir. The north and south transepts (the sidearms) each had two chapels where ordained monks could pray and celebrate private masses. A square-ended presbytery occupied the east of the church, and steps separated this, the holiest spot in the precinct, from the monks’ choir. It was here that the High Altar stood, that the Mass was celebrated and Communion received. The High Altar was framed by arcading and sat on an island in the presbytery; behind this, five chapels were set in the east wall. A light would have burned before the High Altar throughout the day and night, but the twelfth-century altar would otherwise have been simply adorned. In the late nineteenth century, the twelfth-century table of the High Altar was given to the Benedictine monks of Ampleforth (1870), where it is now used as the altar of St Benet’s chapel. |